Iowa Medical Partners
Stay Connected!
  • Home
    • Who We Are
    • What We Do
  • Activities
    • Welcome Brunch
    • Family Welcome Picnic
    • Goodbye Party
    • Date Night
    • Book Club
    • Children's Activities
    • Entertainment Club
    • Play Group
    • S.pouses O.ut S.ocializing
    • Philanthropy
    • Meal Trains
  • Membership
    • What is included in my membership?
    • Join Today!
    • Officers
  • Blog
  • Housing
    • Post Properties
    • SALE Listings
    • RENT Listings
    • Need a Realtor?
  • IMP Sponsors
    • GreenState Credit Union
    • Tundi Brady with Urban Acres
    • Nathan Brooks with 25 Financial
    • Gold Sponsors: Nanci Kohl with State Farm
    • Interested in Becoming a Sponsor?
  • Resources
  • Contact

DIY: Wood Pumpkins

10/20/2014

0 Comments

 
Picture
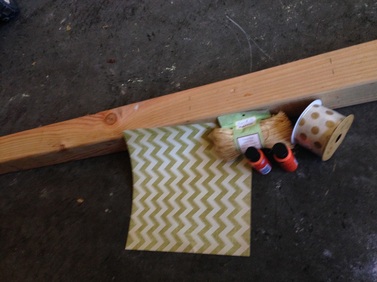
For this project you will need a 4x4 piece of wood (mine was 8 feet long and big enough to do this project twice), a measuring tape, a pencil, a power saw (I used a jig saw but something with a bigger blade would be a better option),sand paper, orange paint, a power drill, thin branches (we got ours by walking though the neighborhood), glue, ribbon and other accessories.
Picture
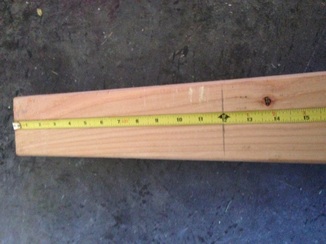
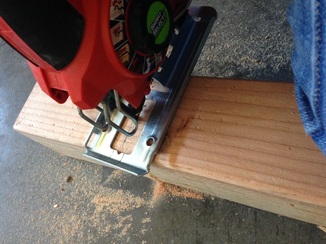
To start I ran to Lowes and picked up a 4x4 piece of wood. I also found out that Lowes can not cut 4x4s in the store. Bummer. So I brought it home and marked it off with my tape measure and pencil. I wanted a 12 inch pumpkin, a 15 inch pumpkin, and an 18 inch pumpkin. Then I went to work with my saw. My jig saw does not have a very long blade so I had to spin the wood a couple of times to cut all the way through.

Picture
Picture
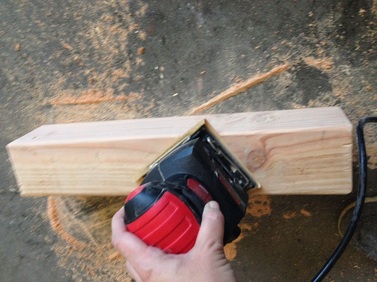
Once I had it cut down to size I sanded down my blocks so there weren't any rough edges. I used a power sander but you could easily do it with some elbow grease.
Picture
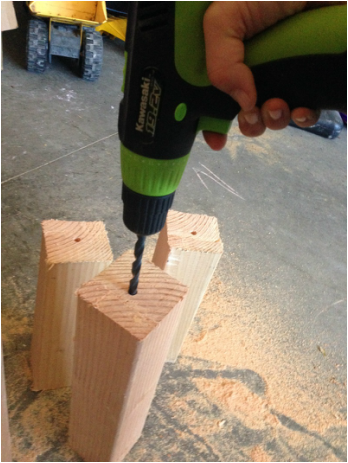
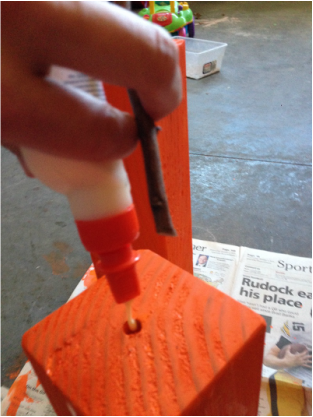
Next I drilled holes in the top of each block in the center. Your holes done have to be too deep. My holes were between 1/2 an inch to an inch deep.
Picture
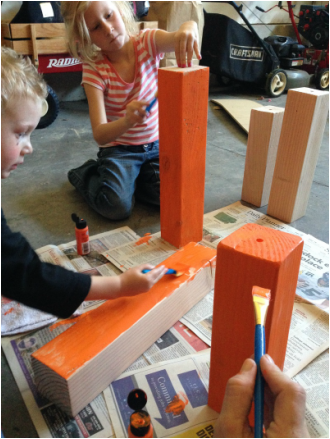
Now for the fun and (if you enlist some little helpers) messy part. Paint your pumpkins!!
Picture
While you wait for your pumpkins to dry go for a walk and find some dry sticks to use as stems. Make sure that they aren't bigger than the holes you drilled.
Picture
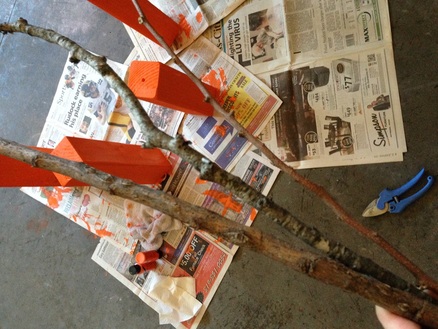
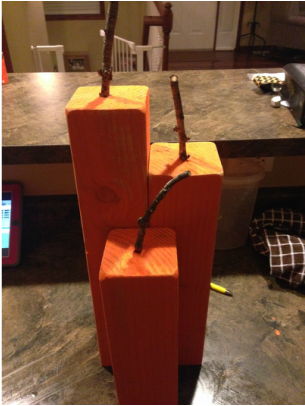
When you get home and your pumpkins are dry, put some glue in your holes and put your stems in. Let your glue dry.
Picture
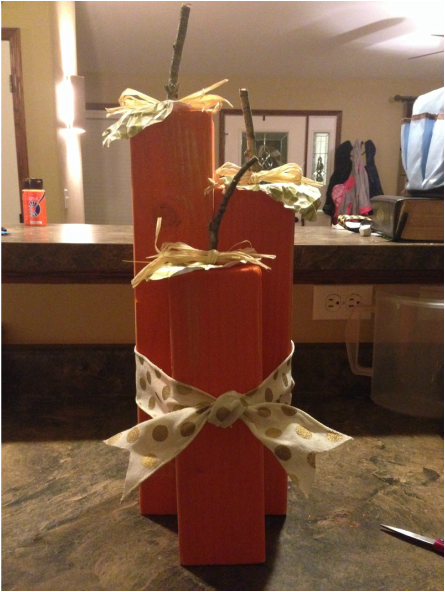
Is everything dry now? Ok good. Now you can finish and accessorize your pumpkins. I used sand paper to distress my pumpkins. I cut leaves out if scrap booking paper and crinkled the paper to give it some texture. I also tied little Rafita bows on my stems and tied all of my pumpkins together with a big ribbon.
Picture
Ta-da! Now go enjoy your new Fall decorations. And keep an eye on the Instagram page tomorrow because I have an extra set of pumpkins to giveaway!
0 Comments


Leave a Reply.

    Enter your email address:

    Delivered by FeedBurner

    RSS Feed

    Picture
    Picture
    Picture
    Picture
    Picture
    Picture
    Picture

    Archives

    March 2022
    October 2021
    August 2021
    June 2021
    April 2021
    March 2021
    October 2020
    August 2020
    July 2020
    May 2020
    April 2020
    March 2020
    December 2019
    November 2019
    October 2019
    September 2019
    August 2019
    July 2019
    June 2019
    April 2019
    March 2019
    January 2019
    October 2018
    September 2018
    August 2018
    July 2018
    June 2018
    May 2018
    April 2018
    March 2018
    December 2017
    September 2017
    July 2017
    June 2017
    December 2016
    November 2016
    October 2016
    August 2016
    July 2016
    May 2016
    April 2016
    January 2016
    December 2015
    November 2015
    October 2015
    September 2015
    August 2015
    July 2015
    June 2015
    May 2015
    April 2015
    March 2015
    February 2015
    January 2015
    December 2014
    November 2014
    October 2014
    September 2014
    August 2014
    July 2014
    June 2014
    May 2014
    April 2014
    March 2014
    February 2014
    January 2014
    December 2013
    November 2013
    October 2013
    August 2013
    July 2013
    March 2013
    February 2013

    Categories

    All
    Children's Activities
    Entertainment Club
    Entertainment Club
    Events
    Giveaways
    Reviews
    S.O.S.
    Trips
    Upcoming Events

Copyright Iowa Medical Partners 2013.